Friday, December 3, 2010

A New Cookie Recipe; Snow Melted Mud puddles


Hey to all!

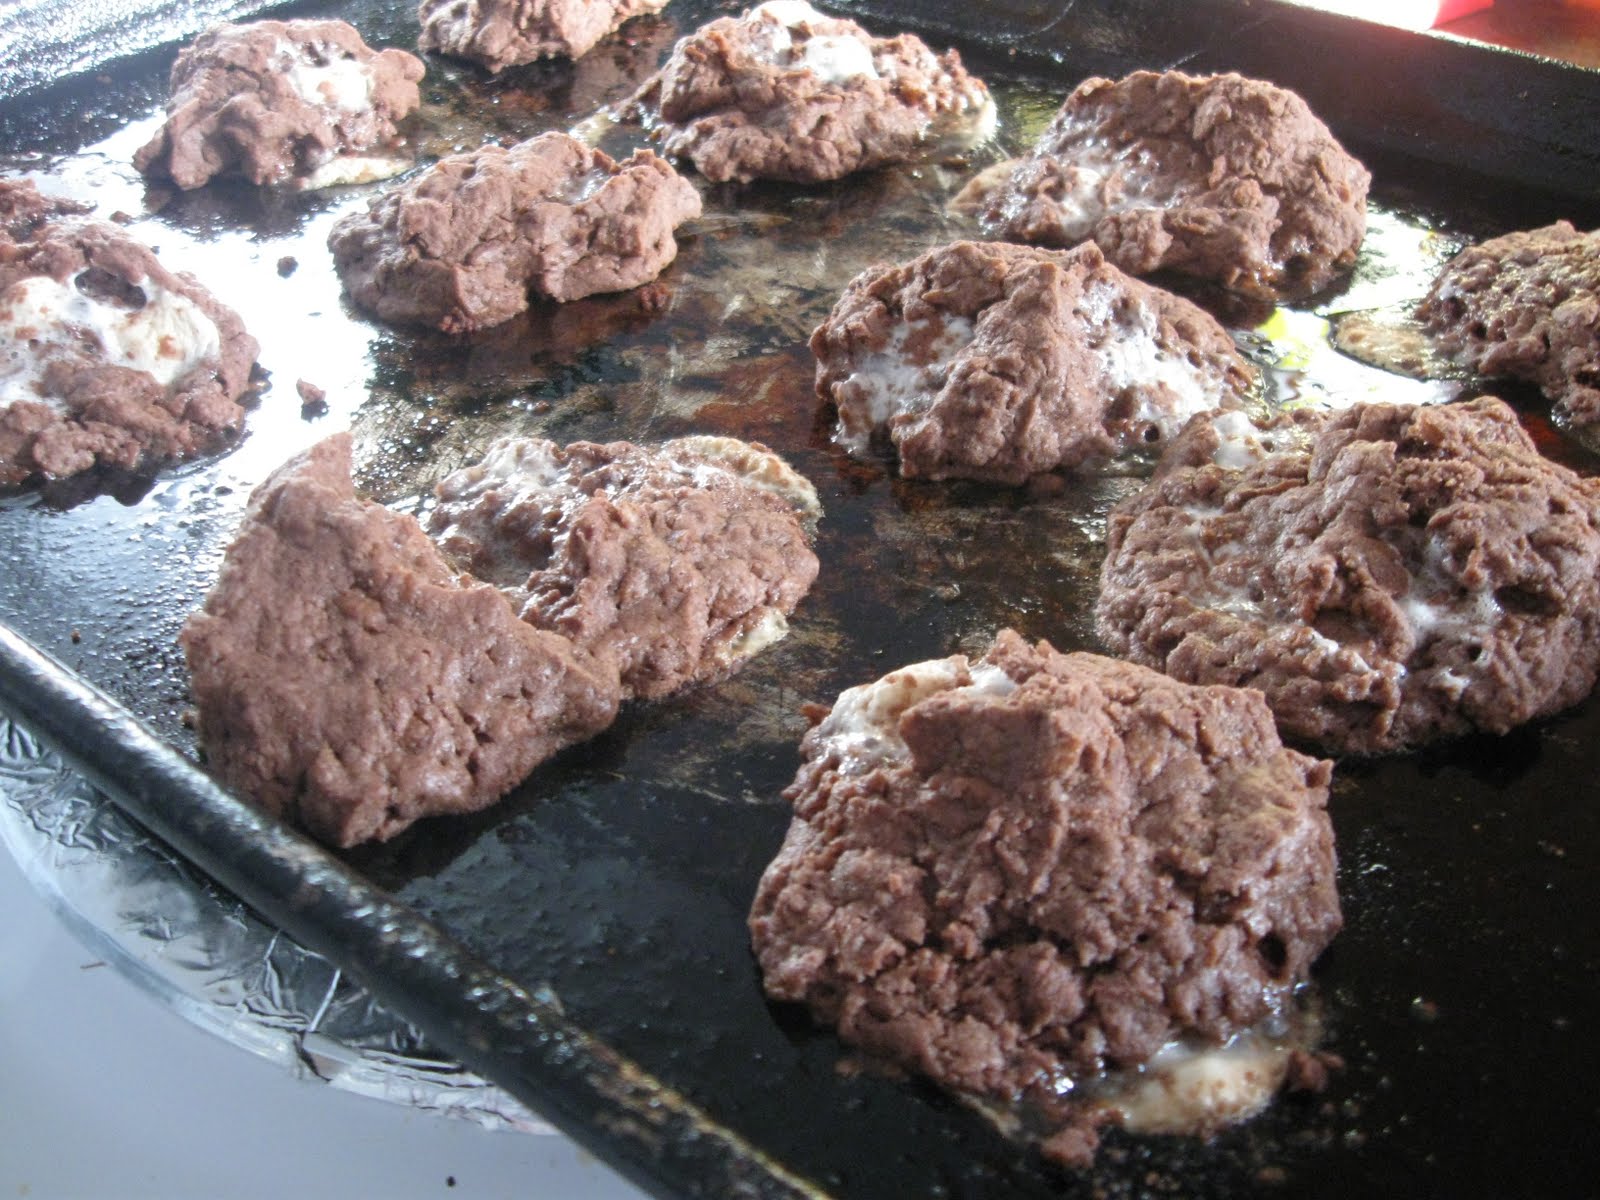
I have an unusual cookie recipe for you, I just happened one day to make these by mistake and they are quite ugly looking but, oh yum!

Most of all they are easy to make... here is what you will need:
  • One box of chocolate cake mix
  • 1 cup of small marsh mellows
  • 2 cups of chocolate Rice Crispies

about one to 2 cups of butter softened

Add your cake mix and rice crispies; add the butter,add one cup first and mix with spoon, until crumbly, and if holds it together pretty well; such as you can roll a ball then don't add the second cup, sometimes it just depends on the type of cake mix you are using, if its too crumbly then begin a bit the the second cup of softened butter and add until you can form a round ball and it all holds together is the best way I can explain this...

Now add your marsh mellows and mix again by spoon until it's all well mixed up; now to form the round balls again, they don't have to be perfectly rounded balls kind of throw together making sure the marsh mellows stay in the mix. These balls are about the size of an ice cream scoop or just a tiny bit smaller. Add the balls to a well greased cookie sheet and bake 12-14 minutes at 350; actually check on them about 10 minutes and see how they are looking they should come out like the pictures above, looking like a pile of mud with a little bit of snow in them! You want the marsh mellows to melt! so that it looks like mud and snow mixed together. You will get 24 cookies because they are so large

Let them cool good and be careful about removing them, take a spatula all the way around the outside edge to loosen as to keep them from falling apart.

The uglier they are the better! I have found they make a great gift idea for your neighbors, friends, family, they look ugly but taste good.

Saturday, November 27, 2010

Sharing just bit of Winter in the Coast Range


Well last Monday I went for a ride in the my Hubby's log truck to get a peek at the beauitful winter weather we got in the coast range and thought I would share some of those photos with you . In this photo we are crossing over Mist Mountain; I just love the way the snow is on the trees, and would you believe this is a 2 lane road that is fairly busy at times.

The second picture is at the top of Mist Mountain and I just had to get a picture!
It was just a beauitful drive seeing the snow and peace and quiet that a winter storm can bring to the Oregon coastal range.

Wednesday, November 24, 2010

In the Spirit of Thanksgiving


I wanted to wish you all a very Happy Thanksgiving and share one of my most favoritive videos.
I have so much to be thankful, yes even those adverse times, good times, but also thankful for little things, such as sunshine, rain or snow even and the beauty it brings.
I am thankful for my parents, husband, son, daughter and her boyfriend and the light they bring into my life.
I am thankful to be here to go through my mortal life and someday return home to my Lord and Heavenly father.
I am thankful for the gift of kindness and graditude for others and other living things, I feel so blessed.
Happy Thanksgiving, may Thanksgiving in in your heart all the year around.

Friday, November 19, 2010

What I am working on for Friday, a stuffed plush polar bear


Good Friday to all!

Today I have been busy sewing up my own idea of a polar bear, I designed the pattern this morning and cut it out and began sewing and I am almost done but not quite.

I am using some white fake fur to make the bear and filling him with fiber fill.
I have used black buttons for eyes and nose and have hand sewn them into the head.
On the one arm in front of him I have sewn part of the arm backwards as to take glitter glue and write love onto the the arm of the bear and some x's.
He is going to be about 14 inches tall and I just he was perfect for the Christmas season, I think make 2 or 1 more of him, oh yes I also added a little powdered blush to those cheeks. I should have him done tomorrow.

Wednesday, November 17, 2010

The Grungy Tom Turkey and His Large Pumpkin a Thanksgiving decor


This is Little Tom Turkey and is Large Pumpkin; I had lots of fun creating this Thanksgiving decor for a center on a table or sitting in a warm place.


The pumpkin and Tom are made from all cotton fall time fabrics and they are my own designs or patterns for both.


Tom looks quite pleased with himself and the pumpkin he has discovered for the holidays. Both Tom and the Pumpkin are filled with beans and fiber fill and I have attached tom with quilting thread to the pumpkin. Tom is 12 inches long the pumpkin is 24 inches around and 18 inches tall.


I have stained Tom with a special oil based stain to get look I wanted and I only did a bit of the pumpkin and I think it turned pretty well; but then that's what I like about using different stains you just never know what you can come up with when working with a pumpkin and a turkey.


I rubbed the stain onto both items and used a warm rag to help blend just touch. Tom has button eyes and there is raffia tied around his neck. I filled them with beans a bit to gift some weight and so that they will stay put and not run on you. It took me a few days to complete them both but I wanted to take a jump back into Thanksgiving being that it is just right around the bend and I will be adding these two to the Art fire store tomorrow.

Monday, November 15, 2010

What I am Working on for Monday, box Christmas Tree Ornaments


For this Monday I am still working on Ornaments for the tree but a bit different; when I was a young girl Santa Claus would bring jewelry for us girls and stick on the tree in small decorative boxes and so I thought I would shard this idea with you.

What you will need are some cute paper boxes that can be bought a any craft store; I just happened to find a couple of stars and an oval box so it can be whatever you would like to do up for the tree.

I am decoupaging the boxes with some neat looking scrap book paper and choose a type of news print but you can use old wrapping paper or some other scrap book paper that you prefer. So I am tearing the paper and dipping it into the Hodge Podge that I have thinned just a little; about a teaspoon of water was added and I have formed the strips of paper over the boxes letting them dry quite well over night.

Then I got out my wood stain and rubbed it on the boxes so that they will look old and of course aged. I don't have the pictures of me using a hole punch for the tops so the I can pull the ribbon I will be using through to tie onto the Christmas tree when it comes time.
In each box add either some cotton for foam and place ear rings, rings or other trinkets into the box and add a small tag with the person's name so that they can find their gift on the tree at Christmas time. I forgot to mention I also added a bit of glue glitter to the boxes let that dry then add the stain and wipe of with an old rag.

Thursday, November 11, 2010

What I am Working on for Thrus, Wooden Christmas Ornament's


Happy Veteran's day to all, and Thank you to all those who serve and have served !


I am once again busy creating some holiday items; I have been working on some Christmas ornament's. These are quite simple and fun to make, and any craft store will carry the pre-made wooden pieces. I had some holiday craft paper to use for the little round bulb; what I did was trace around the bulb first and cut it out and decoupage to the wooden bulb. Next I sanded the little bear and added a oil based stain and painted the facial features with acrylic paints. I also stained the bulb first let it dry for a day then painted a few trees and some snow for a cute simple scene.


I need to note; that the bear and bulb are separate pieces that I have hot glued together. The finishing touches are some gold ribbon for the the bear and some jute so that the ornament can be hung on the tree. Yes I am trying to give the ornament's a bit of that old look by using stain. In this next one I used wrapping paper and I used a gray acrylic paint for staining. So far it is coming out just the way I want it ; I sanded the bulb down just a bit to get the paint to give it an old look and I will do the same for the bear which I will stain a black being that black bears are found lots around Oregon. I will be adding these to one of my two stores Esty or Artfire, but I also wanted to share how to make them so that you all can get a bit crafty for the holidays with me.